While Inktober may be over, but ink artworks can be created any time of year. I definitely will continue to work in this medium. The last time I worked in it was back in high school, and I bought the ink and nibs earlier this year as I'd been itching to get back into drawing with ink.
First, let's examine the tools used to apply ink. First there is the traditional ink pen or dip pen that has a shaft with interchangeable nibs (which is what I used, mostly). The traditional ink pen is used with an inkwell, hence sometimes being called a dip pen as the nib will hold a small amount of ink. Then there is the technical pen. Unlike the traditional pens, technical pens are free to move in a variety of directions with no risk of splatter. Sometimes these pens will have a brush tip. Of course, there are brushes too, like for Japanese ink paintings.
| (Various types of ink pens-not my image) |
As you experiment, it's important to practice the basics. There are various techniques that can be used to create depth/shading to your piece. The basic techniques are pictured below and are the following: hatching (lines going one direction) cross-hatching (lines crossing over each other), stippling (dots), random lines, and contouring (following the direction of the shape/object). If you were to apply the ink with a brush, you might even do an ink wash (like watercolor). All of the basics are pictured in this post. Many of them are in the first picture. Do not feel limited to these techniques either. Feel free to experiment! I have made ink drawings out of letters (pictured further below).
With the theme being Monster Mash, I knew I needed to sketch out each individual animal before I attempted to combine them (see the below picture with the Monarch Caterpillar). Once I'd sketched each animal, I decided what features I wanted to combine to create the "monster" of the day. What you don't see in the first picture is that there is a fur seal also sketched out in the other corner.
 |
| (Sketch, various ink techniques, and the final product of that day's Monster Mash.) |
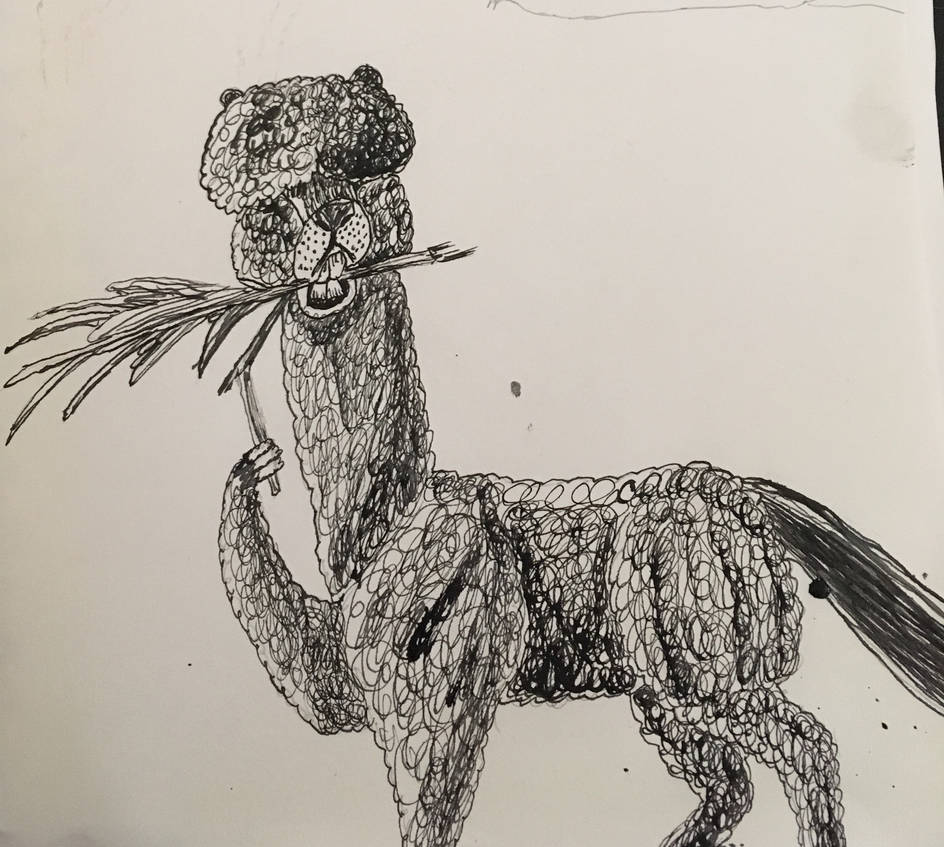 |
| (Beaver X Alpaca-predominantly random lines) |
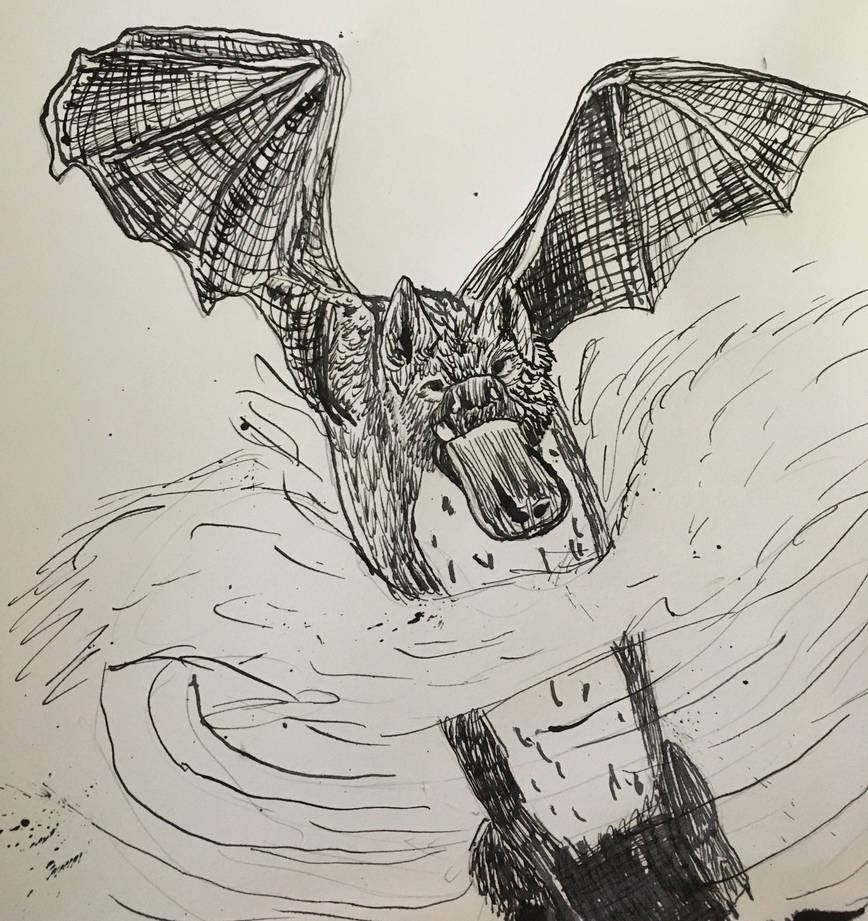 |
| (Vampire Bat X Platypus-hatching, cross-hatching and contouring at work) |
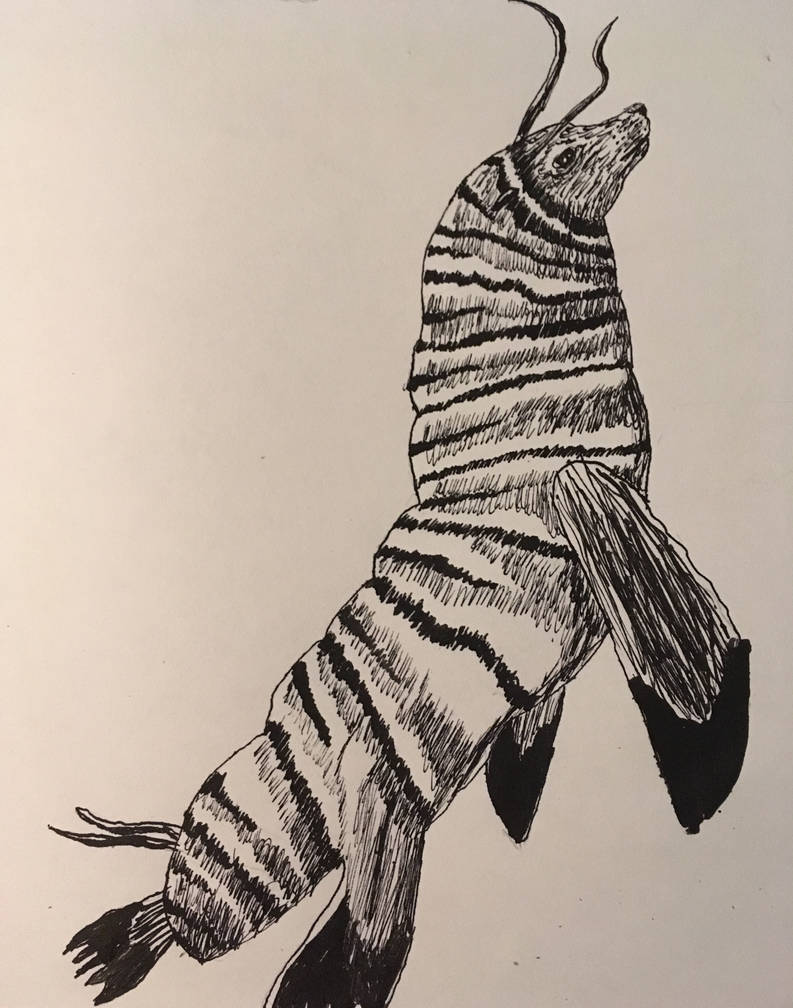 |
| (Fur Seal X Monarch Caterpiller-dominantly hatching) |
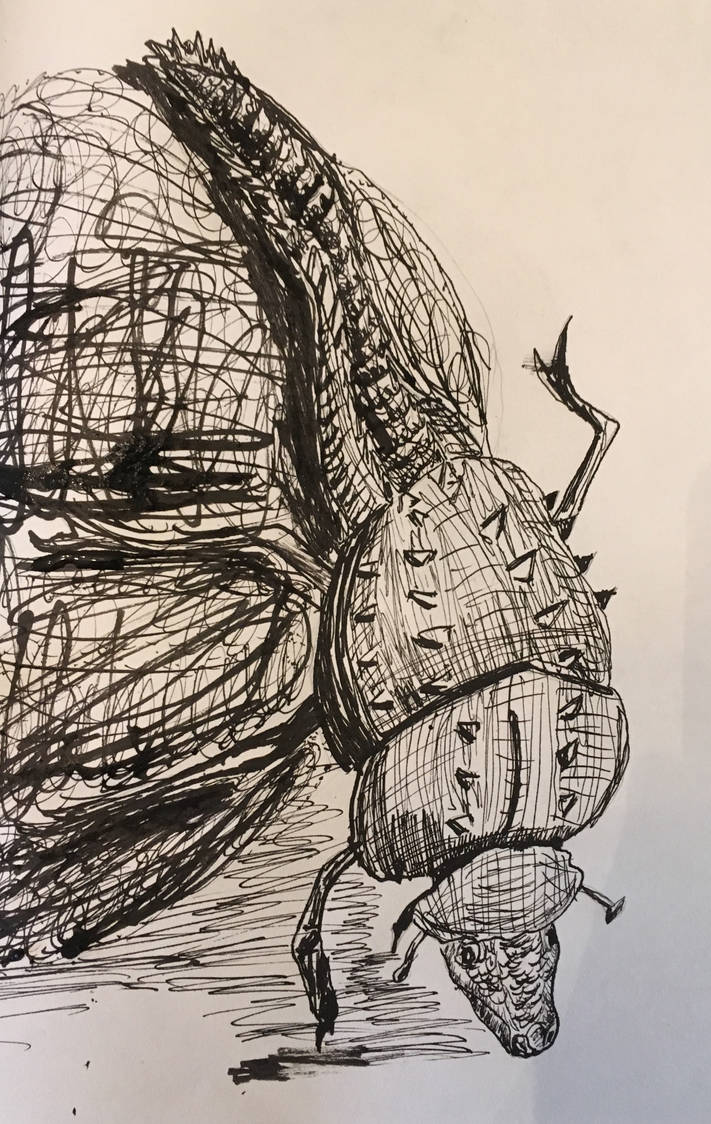 |
| (Dung Beetle X Crocodile-dominantly cross-hatching) |
After the ink had dried I would erase any remaining pencil lines. Then voila! Ink piece is complete.
The Pot Bellied Pig piece is a great example of using disasters to your advantage. Rather than being frustrated with the splatter that occured (thankfully it was minimal on the pig itself) I simply added to it, adding more splotches and splatters to the background.
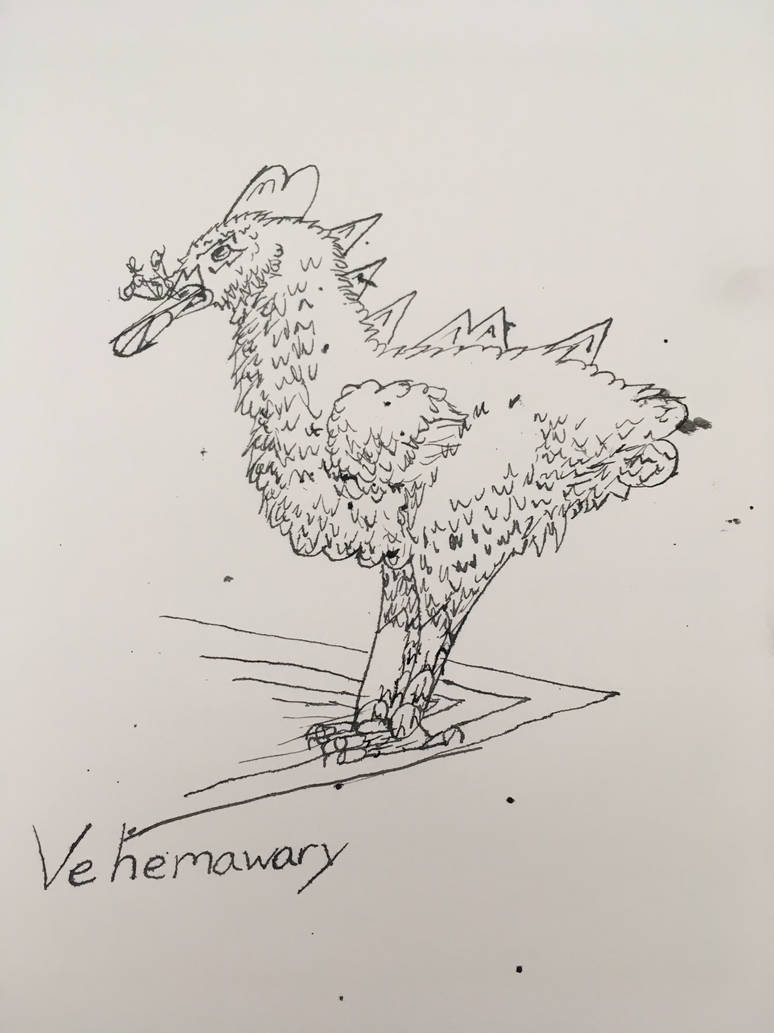
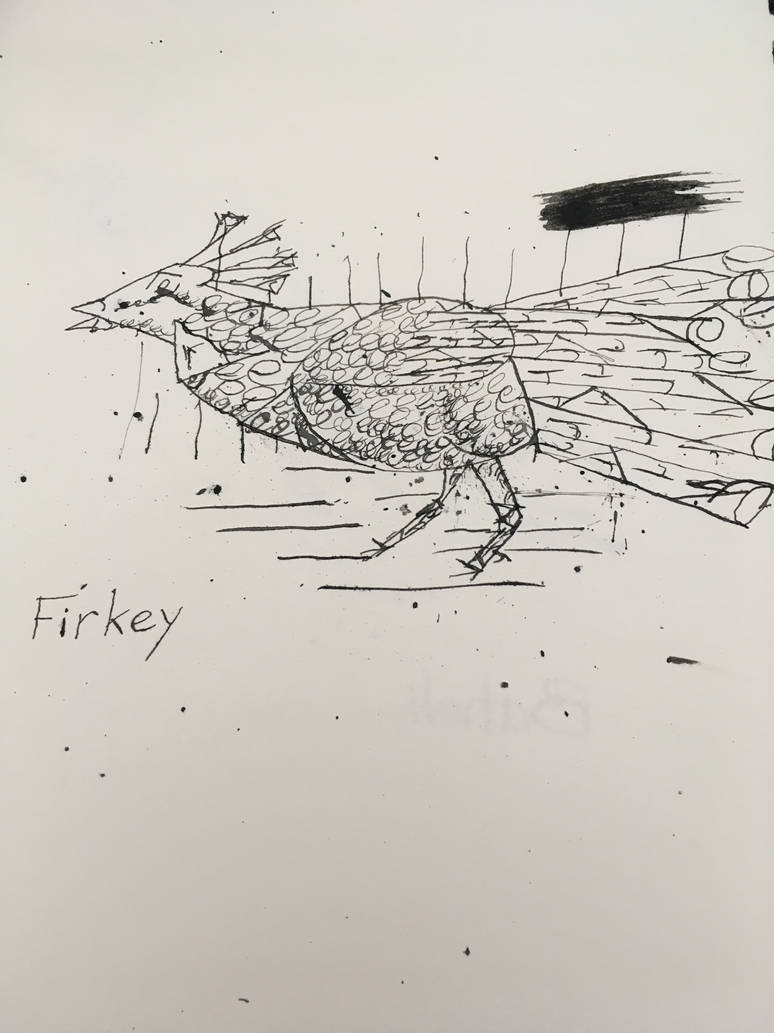
As I stated above, make sure you experiment. While I stuck with the traditional techniques used in ink drawings for Inktober, I have delved out of it before. As a bi-monthly challenge, I ask my DeviantArt watchers what they would like me to draw, what medium it will be drawn in, and the challenge for a period of 7 days. One such challenge was to draw the creatures of a group called Nasty Beasts, using only the letters of said creature's name. I was allowed to distort the letters slightly, but they should be recognizable.
You will notice that there are ink splatters on those two pieces. This is because I tried to move the nib too fast when I was pushing the nib rather than pulling it. It IS possible, to push the nib away but it needs to be done at a controlled speed, and usually slower than the pull.
Of course, I also did a pig in ink too.
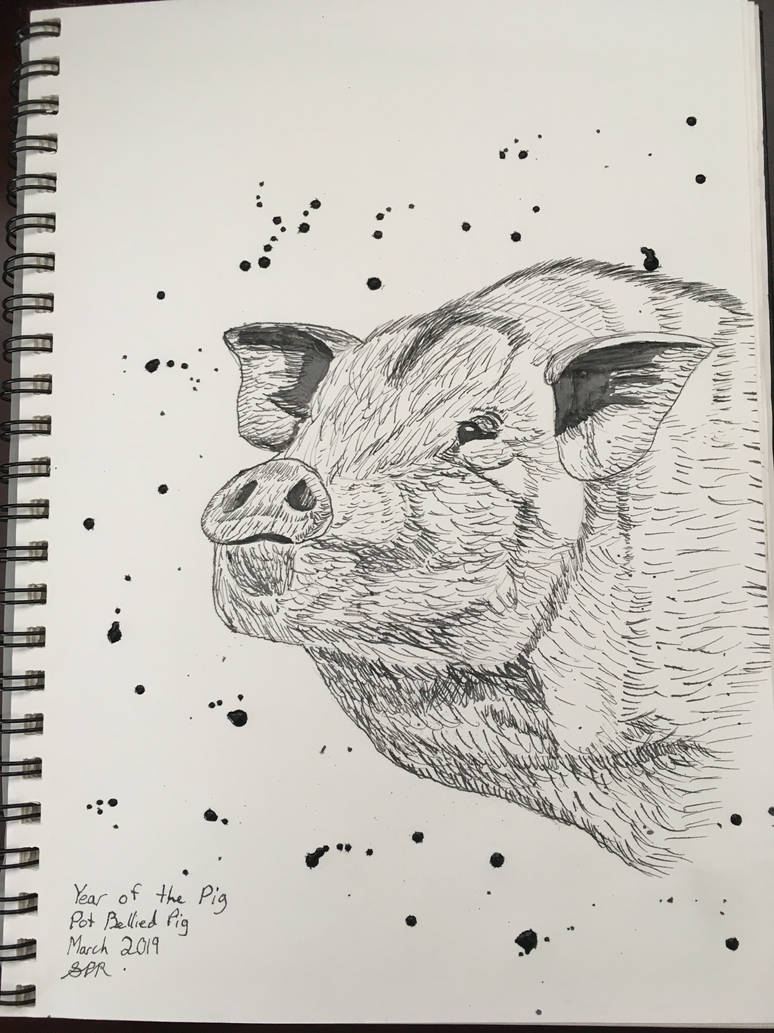 |
| (March's Pot Bellied Pig) |
Do you like ink? Interested in trying it? Let me know in the comments!
Till the next time!
Great descriptions and process! I once did a pointillism piece in India Ink...quite fun
ReplyDelete