Wednesday, February 19, 2020

NaMoPaiMo: Mini Adventures! TWO!

NaMoPaiMo: Mini Adventures!
Week Two: Painting begins!

Adipose started off the week with an unexpected visitor. It would seem that my Quality Control Manager, Renji, the cat, needed to inspect that Adipose's work space was adequate. He also had some words with Rory to make sure that the Goldfish was not being imposed upon by this strange, white creature.


On the same day I helped Adipose post his blog entry; he started to paint! He asked me for my help in picking out colors for his donkey model but insisted that I let him do the painting. The base coat went down without a hitch!
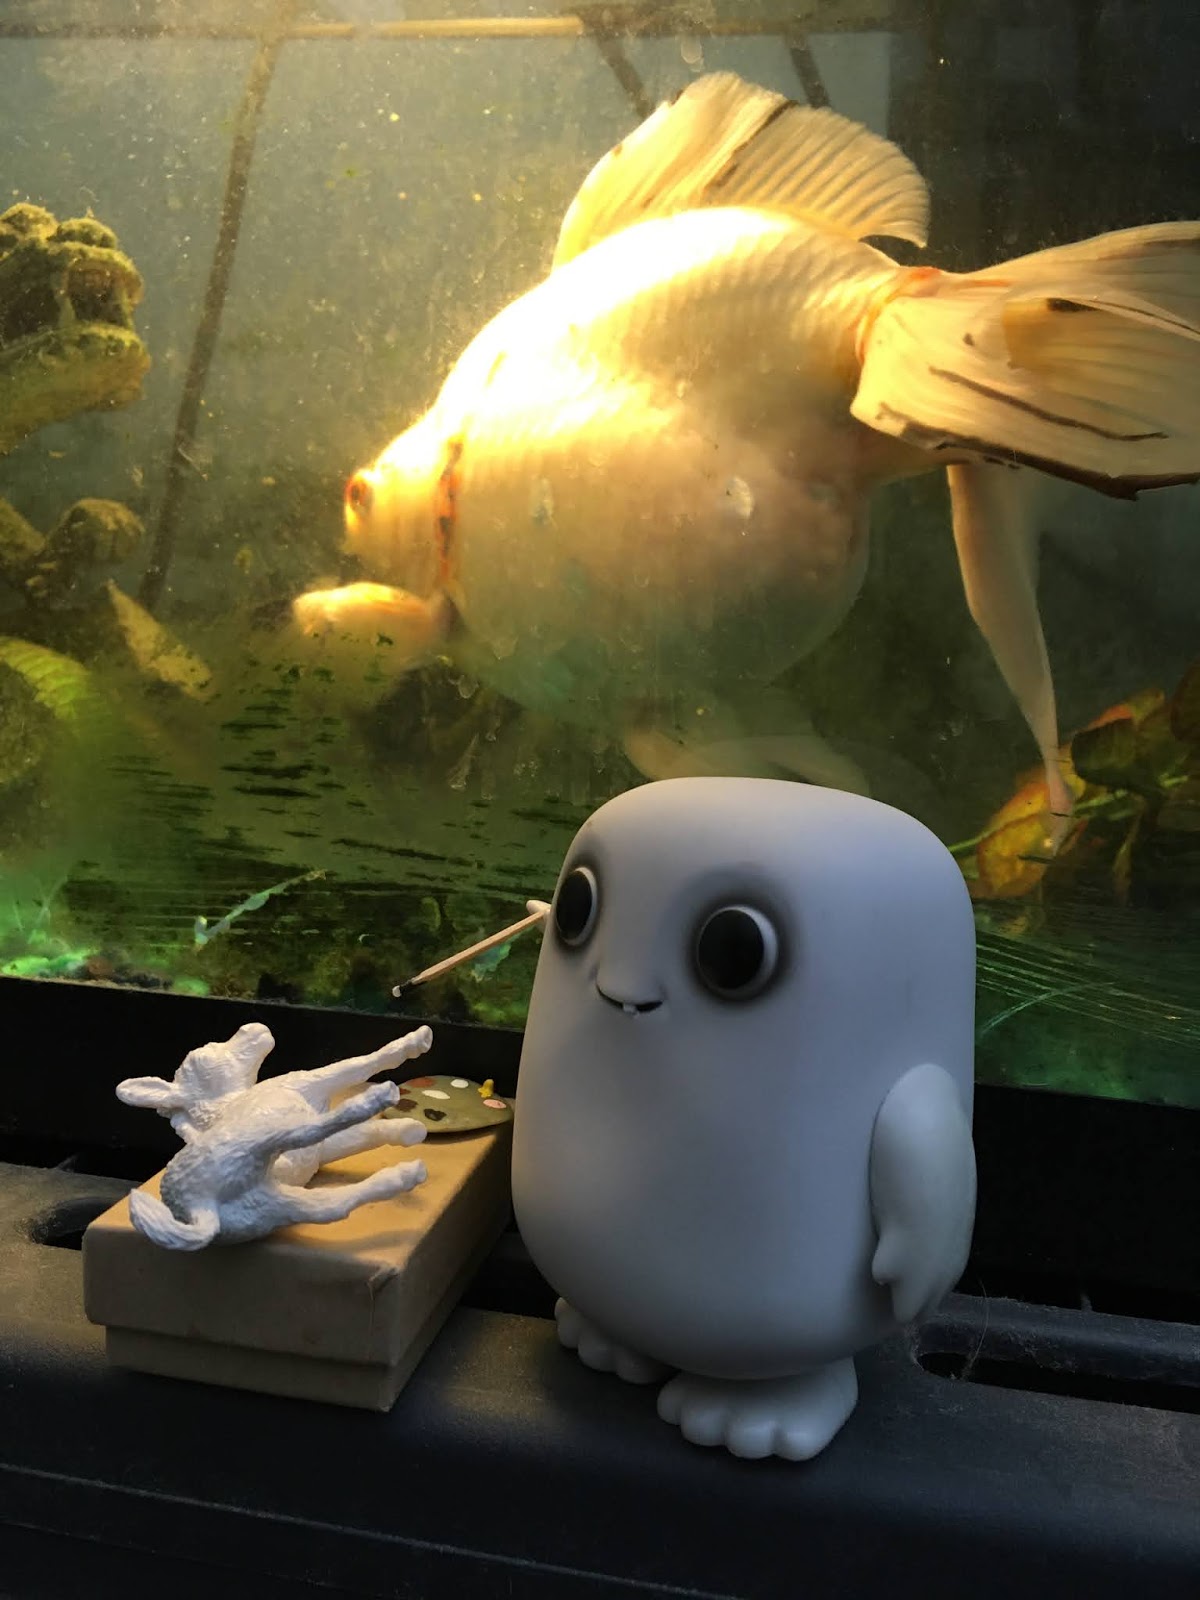

Thursday came, and Adipose was super excited to shade his base coat! He picked some pretty bold colors and I warned him that a little bit of color, especially on white, goes a long way. Adipose brushed it off and eagerly went into his painting. 


I went back to working on my own model (and several others). I didn't see what happened, but the happy sounds of painting soon turned to sounds of exasperation. I wasn't too concerned, as sometimes I did that too, especially if I am trying to paint areas that are hard to access. Next thing I knew, I heard a small clicking sound, like a tiny paintbrush being thrown. Now I was concerned.

I got up from my table and walked over to find Adipose staring forlornly at the wall. Double-checking that his donkey was still on his table, I asked him what was wrong. Adipose claimed that he ruined his model. Frowning, I went to check his model, as when I had given it a cursory glance before checking on him I'd seen nothing wrong. Sure enough, the model, while starkly shaded, was in good shape. No nicks, dings, broken parts, nadda. The donkey was perfectly fine. I told Adipose that the model looked fine and he asked if I'd seen the paint job. I informed him that I had. He asked why I wasn't upset as it could be plainly seen the model would need to be restarted. 


I informed him that his model was not a lost cause and that it could definitely be made into the donkey he wanted it to be. He countered that it looked nothing like any of my horses on my acrylic table. It took a lot of reassuring, but eventually I did convey to Adipose that while the stark coloration looked ugly right now, we could soften it with a layer or two of his base color. No model (that I know of) has ever looked great on its first couple layers of paint, and many suffer from the "ugly stage" for quite some time. It was a natural step in the process and he could keep working on it as it was not a lost cause. I told Adipose that he should probably take the rest of the day off from painting, and continue working on his model tomorrow. He agreed and apologized for losing his brush. 

It turned out that it would be several days before Adipose or I returned to work, but when we finally got back to it today (Wednesday) we went at it with a vengeance!

First, I had to demonstrate on a model what Adipose needed to do. To soften his shading, Adipose needed to do washes of white over his shading. 


Adipose only had to do one wash layer, while I had to do four on my pony. This left Adipose feeling quite smug about his painting abilities. 


Then we moved on to markings. I advised Adipose to use several colors for the spot markings as the fur color would not be the same color throughout on a live donkey. He did this with remarkable speed and his efforts looked quite good!


Once he'd completed his markings, Adipose moved on to softening those said markings. Using a white colored pencil he softened the edges of the spots so that they blended with the fur a bit better. 

After that, Adipose started to work on his details. He started on his eyes and hooves, but then decided that he needed a break. Especially after seeing that I'd zoomed through my Appaloosa pony. He couldn't believe who quickly I'd gotten it done. I informed him that I had more experience and as I liked to work on several projects, it was only natural the pony would be finished.


Not in the least bit reassured, Adipose said he was going to find the Doctor...there was also something about time travel to speed up his painting process...?

Til the next time!


Saturday, February 15, 2020

NaMoPaiMo: Week II: Pastels, Pastels Oh the Pastels!

Saturday and Sunday have just become designated days off. After working at the barn, I usually do not have the energy to work on art.

Monday rolled around and while I got sealer on my model, for some reason, I just could not commit to my model. So while I procrastinated, I posted a picture of Lucky to encourage others on the Facebook page. After all, who doesn't like to see a cute animal picture?

(Lucky believes in everyone! You can paint/finish your model!)
I also received an unexpected visit from my Quality Control Manager. Renji decided that he needed to take a look at all of the pastel horses on my pastel table. I guess it was suspicious that I had so many horses on that table. Usually the acrylic table has the majority of the horses. Later in the day, there also happened to be a family emergency, so that ended any slight indication of wanting to work my model.

While the situation wasn't resolved on Tuesday, I was in a better mindset and set to work...sort of. I first worked on using up the rest of my sculpey clay can making more of my "Ruthless" magnets. I will be donating a couple to NaMoPaiMo as prizes (along with a couple other goodies).

(Four of the six I ended up making of my Ruthless magnets)

Eventually, I did get to work on my kirin. I got three layers on my model and was content with that as my base color, as I did not want the model to be too beige in color. I was aiming more for a cream base.


For some reason, by the end of that session, I decided that my Kirin needed some dapples. It didn't help that the image I was referencing had dapples in it too. While I have a method I like for dappling in pastels (eraser), I decided that this time, I would try something new. I only started dabbling in pastels last year & I know I have a lot to learn!

On Wednesday, I started shading my kirin's fur, and adding in the dapples. This time, I was just adding with the pastels. There would be no eraser and no paint. By layer three, I liked my dapples and shading enough to call the body shading good. Tomorrow, I'd be ready to start on the dark points I wanted my kirin to have.


Thursday proved to be a busy day in the studio. I really knuckled down and set to work on adding the dark points to my kirin as well as darkening the mane, tail, beard and feathering. 


It was at this point that I decided to add in some pigments. Usually, I don't touch these as they just seem more intimidating. Pastels are one thing, they are easier to get if I do go through them, but pigments...yeah I am not at a point I can get those readily, so I treat the small containers I do have like they are treasure. 


I was feeling really good as I worked on my model. This kirin was looking EXACTLY like I had envisioned!

So, of course, doubt set in. 

By the time I finished for the day, I was frowning at my model. I wasn't upset with it, but I was wondering if the mane and tail were really heading in the direction I wanted? Did I still want this to stay 100% to what I had in my head? How much dark is too dark? Flaws also started to pop off the model too! I could see several dingle-berries (mentor's name for them lol) some spots with pigment/pastel that wasn't meant to be there, and the list just went on!

I stopped for the day.


As artists, we are very self-criticizing. It's both a blessing and a curse. It's a blessing, as it means we are always, ALWAYS striving to do better. It's a curse because we are always belittling our work, even if it's better than our previous works, or one of the best we've done. When I get to a point where I am hearing so much self doubt in my head that means its time to stop on the project for the day. Tomorrow, with fresh eyes, I can look at it from a fresh perspective and without all the negativity. 

It's a bit silly too because I KNOW that many of the things that are being picked at I can fix! Some are just lessons learned for prepping that I can use for the next time. Others are just worries and nitpicking that I need to take with a grain of salt. That being said I utilized the NaMoPaiMo pastel experts asking how they did manes & tails. 

(You can see for yourselves that the advice went a long way!)

Mondays & Fridays are physical therapy for my shoulder & this session wiped me out! Thankfully, I was able to read & take the advice of our pastel experts (thank you all so much!) and base coated, in acrylic, the mane, tail & feathering. This has revealed that I have a long way to go on my points to get them dark enough, but that’s fine. We’ve got two weeks left in February yet. That being said, I did grab my colored pencils & did some simple shading to be softened with pastels next week.

(Stopping point for this week)

Till the next time.


Wednesday, February 12, 2020

NaMoPaiMo: Mini Adventures!

NaMoPaiMo: Mini Adventures!
Week One: Choosing Your Work Space Shouldn't Be This Hard!

This year for NaMoPaiMo there has been the addition of Team Minis Painting Minis (#teamminispaintingminis). Originally, I did not intend wrangle any of my figures to participate, as my NaMo kirin, while going smoothly so far (knock on wood) is quite challenging!

However, I soon found myself wanting to participate in the fun everyone was having with their action figures from Tony Stark/Ironman, Dr. Strange, The Doctor (13th), Batman, Bucky (The Winter Soldier), Natasha/Black Widow, etc. The problem was...I don't HAVE many action figures.

At first I considered my T-Rex-Rexy...but she promptly mangled her model!


Then I remembered that I had a pose-able Kakashi Hatake (Naruto) figure. But like any good Leaf Village ninja...he was nowhere to be found (maybe next year).

From there, I considered my Funko Pop Doctor (13th) but as someone was already using a (way cooler) Doctor, I didn't want to detract from it. Then it hit me! I had a Funko Pop Adipose (which, let's face it, is basically the same as the regular Adipose!) from the Doctor Who series.

So Adipose was brought out. Now the next question was-what model?

At first, Adipose wanted to paint my new Maggie Bennett micro, Timken. I promptly shut that idea down as I wanted to paint it lol.

(The shot-down Adipose model-January 2020 Maggie Bennett release-Timken!)

I also had to stop Adipose from taking from my sales box of model horse bodies. I explained that it was my tradition to keep the NaMoPaiMo models as they served as a gauge of my skills through the years. Adipose decided to adopt this tradition too and went to the correct box of "keeper bodies".


Finally, the chosen model was pulled out a (pre-primed) Breyer Stablemate Donkey! A fantastic choice!


Next, Adipose had to pick out a color to paint his model. Of course, Adipose wanted to paint a white donkey. Even though it's his first time, I reminded him that there should be more of a challenge to painting his model. After some huffing, he settled on a red/chestnut spotted donkey (dominantly white please & thank you!)

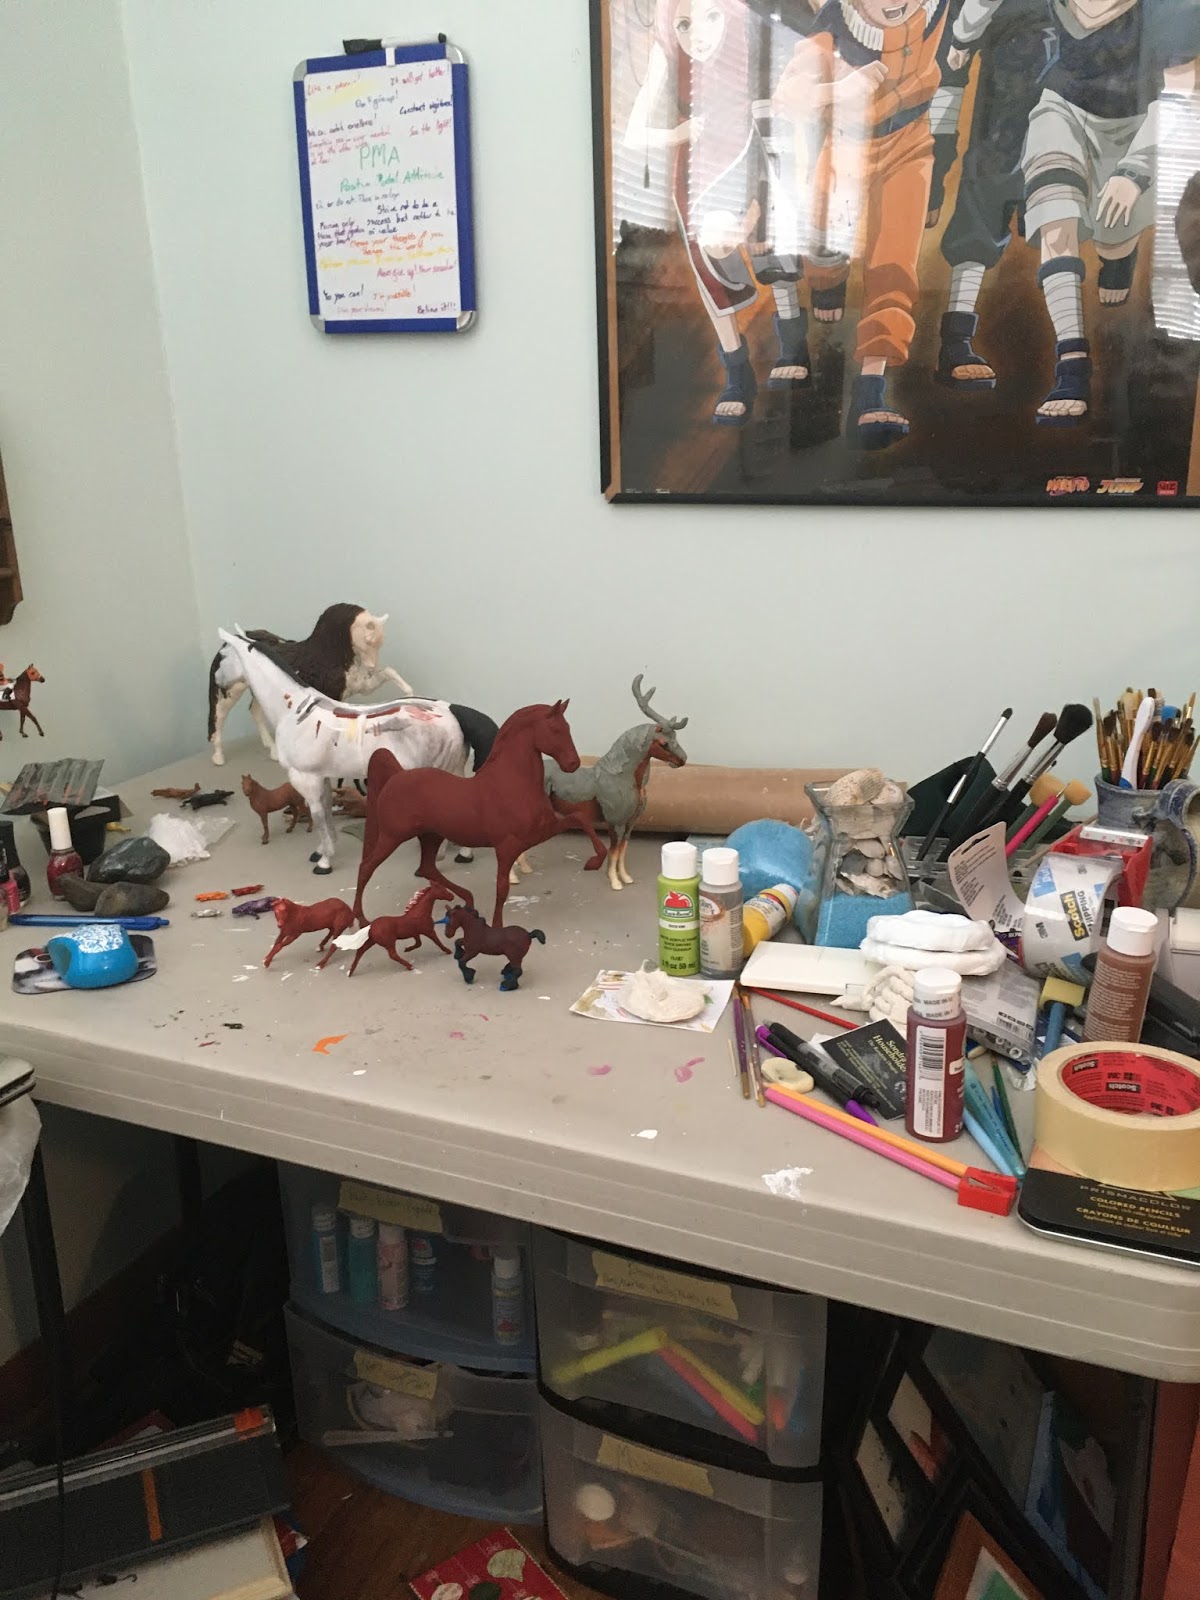
With the color chosen, I helped Adipose to my studio tables. Now, I don't claim to be an organized or clean person, but apparently my space was a bit too...crowded? Disorganized? Whatever it was, Adipose was appalled at its state!


So began Adipose's search for a space to paint! He looked high, he looked low, but many, many, MANY! Spaces were occupied by intimidating sizes of model horses! Adipose couldn't oust them from their spots! They were too big! Plus, he asked and I said no they were staying. 

Finally, Adipose felt he'd found the perfect spot. It had the room for his little table, model and most importantly, himself! A few stuffed animals and a Hippocampus with far too high an opinion of herself would just have to be relocated! Plus, the view was just grand!


At first, I was against it. After all, that area was Rory's (Goldfish) space. He quite liked his sea-themed exterior. Also, there was the issue of sealing. Not to mention the fact that the spot was on perfect level for Lucky's tail to swat Adipose and his model off! Even a curious cat may want to take a swat at them! Was it worth the risk? 

Adipose made some good points-it was well lit, he wouldn't seal his model near the tank, and he'd even get to know Rory beforehand. After these points? How could I say no? Plus the background for pictures would never be boring with Rory!


Adipose spent most of the day getting acquainted with Rory. While Rory still seemed wary of Adipose, he at least wasn't outright against the addition. I think Rory found a certain resemblance shared between himself and Adipose. Maybe Adipose felt the same connection? He does look kind of fish-like! Rory was at least not against the move, unlike the Hippocampus, Ursula. Oh did she put up a fuss at being moved! Even reasoning with her that she was now out of a dog's tail range, she was still squealing and striking out with her fore-hooves...she even tailed slapped me!

The arduous move aside, I managed to get Adipose and his model settled and ready for painting to begin! 


Adipose says, "Till the next time!"


Saturday, February 8, 2020

NaMoPaiMo: Week I: Questioning my Sanity

For once, I started the month off with an already prepped model...but I still didn't start painting until day three. Working at the barn & traveling around left me worn out this weekend & unwilling to do more than curl up on the couch and read with Lucky snuggled up next to me.

(Tired out Lucky accurately summed up my energy level over the weekend)

That being said, thanks to my prepping, it was an easy thing to start on my model, on Monday, by starting with a yellow base coat. While I'm not sure how common colored base coats are in the hobby, I've found that they are quite helpful. They add a little extra to the overall color, even if it's very slight.


I nearly forgot that I stated in my entry that I would do acrylics & pastels on this Kirin. Bearing this in mind, I decided that the scales would be done in acrylic, while the actual "horse" part of the Kirin would be done in pastels. Based on my sketch, I wrote down that I would have an emerald green for the scales, as Kirin are described as having "jewel like scales". I also knew from my sketch that the body would be a light color-maybe a cremello or some other light coloration. Admittedly, I've been pondering the colors of the horns, hooves, mane and tail. 


Starting off with the scales, it became clear that between my priming, base coat and now the dark green, I was fast losing the definition of the sculpted scales. I was hopeful that I would be able to save them even knowing that there were more layers to come.


Continuing with the process, I started to add shading to my scales basing them off the hues seen in an emerald and using a green colored Betta Fish to aid in shading. It was at this point that I questioned my sanity. Not only was I struggling to find where I had made the scales as some had already been lost, but I was questioning why I'd made them so tiny to begin with! It was hard to apply a rough mid-tone to the scales. 


I finished the mid-tone color I wanted each scale to have, and it was at this point that I decided that I was going to ignore the sculpted in scales. Too many of them were lost or would soon be lost in the next wash of paints. 


In between layers on my actual model, I was also working on pasteling several models. I was testing a new technique to see if it was something I would use on my NaMo horse. I'm glad I tested it. While I liked it at first, I soon grew annoyed with it. Now, it was probably my application, but trying to soften the acrylic paint shading, surprisingly, annoyed me more than just using a flat base coat. The closet one I liked, and would use again on a dark horse, was my Morgan mini by Maggie Bennett. I actually shifted him over to the pastel table as I wasn't getting the effects I wanted on him via paint. 

(The pastel models some with paint shading some without near the start of their journey)
The next step on my NaMo model was to add in the rest of the shading. First, adding light tones on him followed by darker tones. When I do this I try to not use black, white or even grey. I prefer to use colors as I find they add more to the model than the neutral black, white and grey. Even more so in this instance with the scales. I decided to go with a blue and yellow (though I first used a lighter green than the base and didn't like it). You can see in the picture below that I wasn't as restricted in my application of the scales and more free-flowing.


To finish off the scales, I went over them with a wash of the original base color. To do this I used a thin, nearly watery, wash of that dark green so that it softened the shading but didn't lose the details I just put on. While I know it will look better once the scales are glossed; I can't help wanting a more shimmery or jewel like look to them. I will have to see what I have in my bag of tricks (and maybe phone a friend too!)


The next day (Thursday), I started off the day by bringing out good ol' Paint. Paint is there to take on just that-paint. He's my test model for paint thickness, color, etc. This time, Paint got brought out for extensive testing. While I do not have metallic paints on hand, I do have nail polish. More than is probably healthy for someone who does not use nail polish outside of painting model horses...

(Four polishes-convenient spot of green paint for glitter polish to go over)

Anyway! First, I pulled out four green polishes to test thickness, color etc. Two paints were immediately removed as one was too thick when applied while the other was just not the right color, even if it was a thin coat. The other two were a glitter polish and a nice dark green. I set up a test area that mimicked the scale pattern on my kirin and first put on a single layer of each.

Upon seeing the lovely thin coat I could get with the dark green, I put a second coat of glitter polish down (to see if I liked that better than a single layer) as well as putting some over the dark green. I was quite pleased with the glitter polish over the dark green and decided that would be went I used on my kirin. 

(The test area for top two polishes)
From there I was more focused on my horses that needed pastel layers than my NaMoPaiMo horse. That being said, I did get one layer of white over the yellow so that my kirin was no longer dominantly yellow. As much as I love what colored bases do to subtly shift a colors, I am more than happy that 80% of it is gone! I will do at least one more white layer of acrylic (if not two) and will than start on my pastel layers. I'm aiming for a cream colored horse with dark brown points, mane and tail. I'm thinking the scutes will be gold, but I might use paint one last time to see what I like better with the green scales.

(Much better!)
I did get one last layer of white over the yellow on Friday, as I was having quite a rough day (honestly over something silly that I shouldn't have let bother me...but alas, it did). It was a struggle to make myself do even that, but I'm happy I did that small bit of painting as it did improve my mood. Now I just need to seal the model and I can move on to pastel work.

This week I have also finished several models that I started either in January or even last year!


So that's all for my week in NaMoPaiMo. No painting today as I was at the barn giving riding instruction lessons with another instructor. I also have a mini/action figure on Team Minis Painting Minis, but that's a blog for another day. 

Till the next time!


Tuesday, February 4, 2020

NaMoPaiMo: Prequel

I'm running behind in my posts thanks to my phone holding up the whole kit and kaboodle by holding my pictures hostage. Thankfully, I was able to wrest them from it's grasp and now have them on my computer.

I wanted this post to serve as a "bear in mind" type of post. Take it as you will. These are things I have noticed in my two (going on three) years of participating. These are things that come up in various ways/shapes and I think they should be addressed.

(Logo of NaMoPaiMo)

I wanted to post a "prequel" to my NaMoPaiMo adventure (prepping is just an early start to it lol). NaMoPaiMo is a large model horse hobbyist event that started four years ago and has become such a huge part of the model horse hobby. It has inspired other "month" challenges like tack making, customizing, medallion painting, etc. It's grown so much that I think, sometimes, people forget that it all started with one person: Jennifer of Braymere Custom Saddlery While help has been recruited, it's important to remember that she is only one person. This means that we all need to be patient in waiting for responses in regards to questions, donations, etc. She runs this event out of the sheer goodness of her heart, let's not forget that. So first and foremost, thank you so much, Jennifer! I for one, would not be where I am at, currently, in my customizing if it weren't for this event. Thank you from the bottom of my heart.

Next on the agenda is remembering that there are various artists participating at various skill levels, budgets, circumstances, etc. When offering advice (and I try to bear this in mind too when I do put in my two cents) be careful that you're tone is not condescending (of course this is difficult in "text" or "typed words"). Remember that not everyone is capable of getting the high end materials or tools. Also, as this is a hobby-wide event, make sure to participate in conversations! While I am not the most "vocal" in the group, I always make sure that everyone has a comment on their finished pieces. It is a huge. Read that again: HUGE accomplishment to complete a model, especially in an event like this. No one should check to see if their picture has comments from other hobbyists to find that no one has noticed their hard work. It can be crushing, especially to someone new to customizing. Also, don't be afraid to chime in when someone asks for help. You may provide insight to the problem that the person is facing that maybe others have not been able to offer. I am personally still working on this point. The point of this paragraph is participate, participate! PARTICIPATE!!!


Now that we've got the social part out of the way, let's consider our perspectives as artists. As a whole, artists tend to be very self-criticizing. There have been many great posts from various artists in the group (which is fantastic!) in regards to this very topic. The biggest piece of advice that's going around is: don't compare your work to others. Just don't; and I'm going to give you a great example as to why!

At the last model horse show I attended my friend and I were both showing our mini Clydesdale mares in the same class. Being as self-critical as I am, I looked at my friend's mare, then at mine and said "Mine is not going to beat yours." My friend chastised me and reminded me of the success I'd had that show (several of my pieces-first time for me-had gotten in the top three). My mare placed second, my friend's placed first. HOWEVER, it was a tough class. That my mare had gotten second was awe inducing to me. I considered her "muddy" and yet their she sat on the table with a second place ribbon.

(Mini Clyde mare of the story)

This is not for attention or to garner "but it looks great!" comments. It is just a prime example of why you shouldn't compare your work to others. Instead, compare your work to YOUR past work! For instance, I have an old black and white paint horse on a Mesteno. Last year, I painted two other black and white Mestenos. I see a difference, I see improvement.

(2011 Mesteno)
(2019 Overo Mesteno)
(2019 Tobiano Mesteno)
My next point of this prequel applies to everyone, but particularly beginners. We all have a wealth of knowledge at our disposal this month when artists are more than happy to share their secrets, techniques and most importantly, their experiences. Make use of this! Having trouble with eyes? ASK! Not sure how to do manes and tails? ASK!! Want to learn how to paint hooves realistically? ASK!!! There are so many artists participating who are more than willing to help others out! Do not waste this opportunity to learn! While I said this mainly applied to beginners it applies to all artists really-never stop learning, for that's when we truly fail. Always seek ways to improve, even if your work is in the class of the elite. Everyone can always learn some new tricks/techniques.


From there, we need to talk about materials. Every artist has their favorite material(s) that they like to use to paint horses. Does that make one medium better than another? Absolutely not. Do not feel that your hand-painted acrylic horse is inferior to a different medium. I have seen hand-painted acrylics from the start of the hobby kick-butt at shows against those other mediums. I have also seen acrylic painted horses done by artists TODAY beat out their pastel/oil couterparts. Don't take that out of context! I use pastels and I want to learn how to use oils this year. Heck, I want to do a horse entirely out of colored pencil too! (They are cool!) You need to remember that each medium/material has its pros and cons & they each have their own learning curve. Find what works for you! I work dominantly in acrylics because I am most comfortable with them. Like I said, I am learning how to use pastels, and I intend to learn about others too. It's all about what YOU, as the artist, are comfortable with. 


As we near the end, we need to discuss studio space too. There is more on it below, but please don't think that you need to have your own studio to create art. I create my art in the corner of my bedroom with a hodge podge of tables, plastic drawers, an easel I cobbled together, and organized chaos everywhere. You can create art wherever you deem appropriate. If it's just on a small table or shelf, that's fine. If it's in your lap because you don't have the counter space, that's fine too. There is no right way or place to do art. 


Finally I want to end this post on what I posted to Instagram (in "reply" to posts I'd been seeing on various social media).

"There has been quite a few people sharing their work spaces/studios/studio space on social media recently with NaMoPaiMo starting in only a few days. 

"I wanted to share my own space and philosophy. You can see there's been an upgrade from a board over the two drawers to an actual table (it was given to me so no cost on my end besides lugging it home). But the duct-taped easel remains & most likely will for some time. I have attempted organization but you still see organized chaos due  to space. My materials/mediums are not the most expensive brands (& I can say that I have had success with my paint jobs in photo shows & live shows). 

"Admittedly, it's taken time and practice but please, do not EVER feel inadequate because your work does not "measure up" to someone else's,  or that your materials are inadequate to create "good" or "great" art. You CAN create (great) art with any materials, any place, any technique & on any budget. Do what works for YOU, keep practicing & learning & make art to make yourself happy. 

"You cannot please everyone, nor can you compare to anyone. We are all unique individuals with different personalities, learning styles & views of the world we share."

I hope this proves helpful to people Till the next time!